Early beta

Design it the way you already know.
Build it from real lumber.

WoodSketch is a free 3D modeler for woodworkers. Draw your project with the tools and shortcuts you already know, and it hands you a cut list, cutting diagrams and a shopping list sized to the boards and sheets you can actually buy.

Free and open source. Windows first. Built from source while it's in beta.
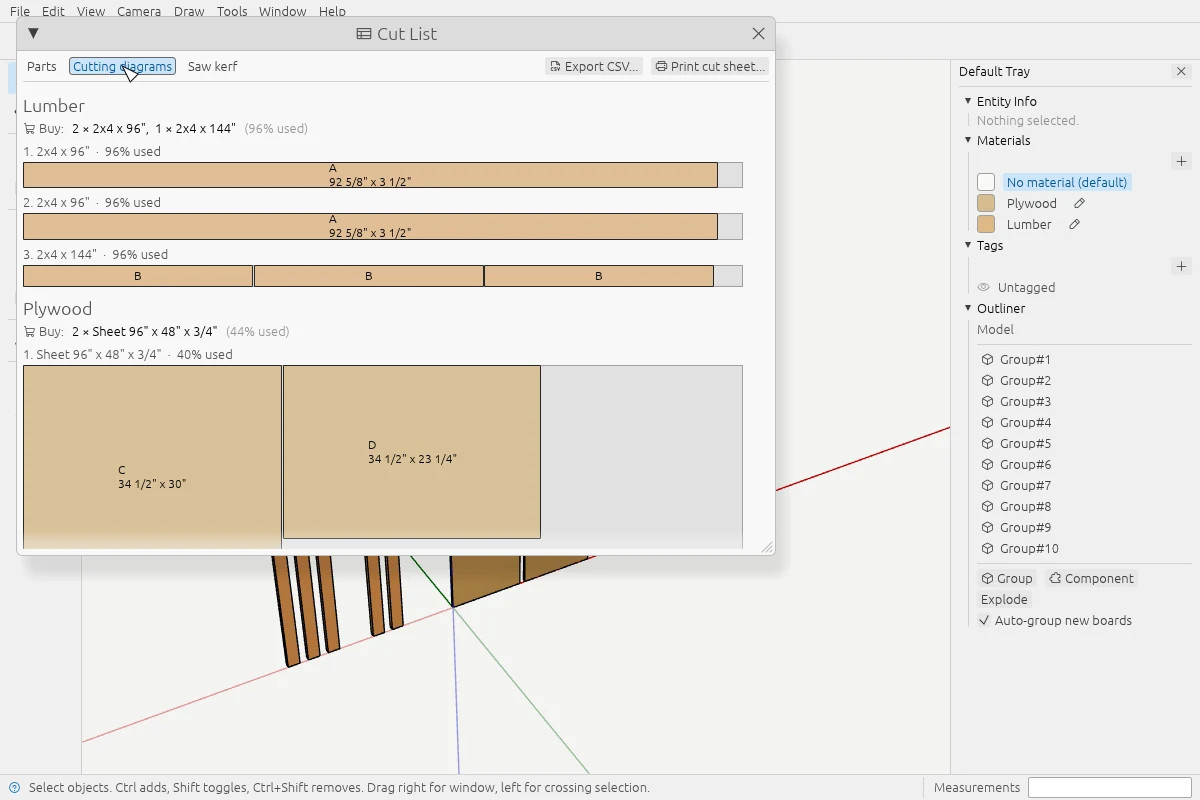
WoodSketch's Cut List window. Lumber parts are laid out on two 8-foot and one 12-foot 2x4, plywood parts on a 4 by 8 sheet, with a 'Buy' line listing the boards and sheets to get.
Cutting diagrams and a shopping list, worked out from the model: 2x4s laid out on standard lengths, plywood parts packed onto 4×8 sheets.

Why WoodSketch

Familiar if you know SketchUp

Same tools, same one-letter shortcuts, same habit of just typing a size: draw a rectangle, type 24,3/4", push it up 38mm. No relearning.

Parts know they're wood

Give a part Red Oak or Baltic Birch and it knows its species, its grain direction and whether it's flat-sawn or quartersawn.

A cut list that knows real stock

Every part picks the board or sheet it comes from. A 1½ × 3½ × 84 stud becomes "buy a 2x4, 8'", not a list of numbers you still have to work out.

Free and open source

No subscription, no account. Licensed MIT or Apache-2.0, and the code is on GitHub for anyone to read, use or improve.

What it does today

WoodSketch is in early beta. Everything on this page works in the current build; what's still coming is listed under Where it's headed.
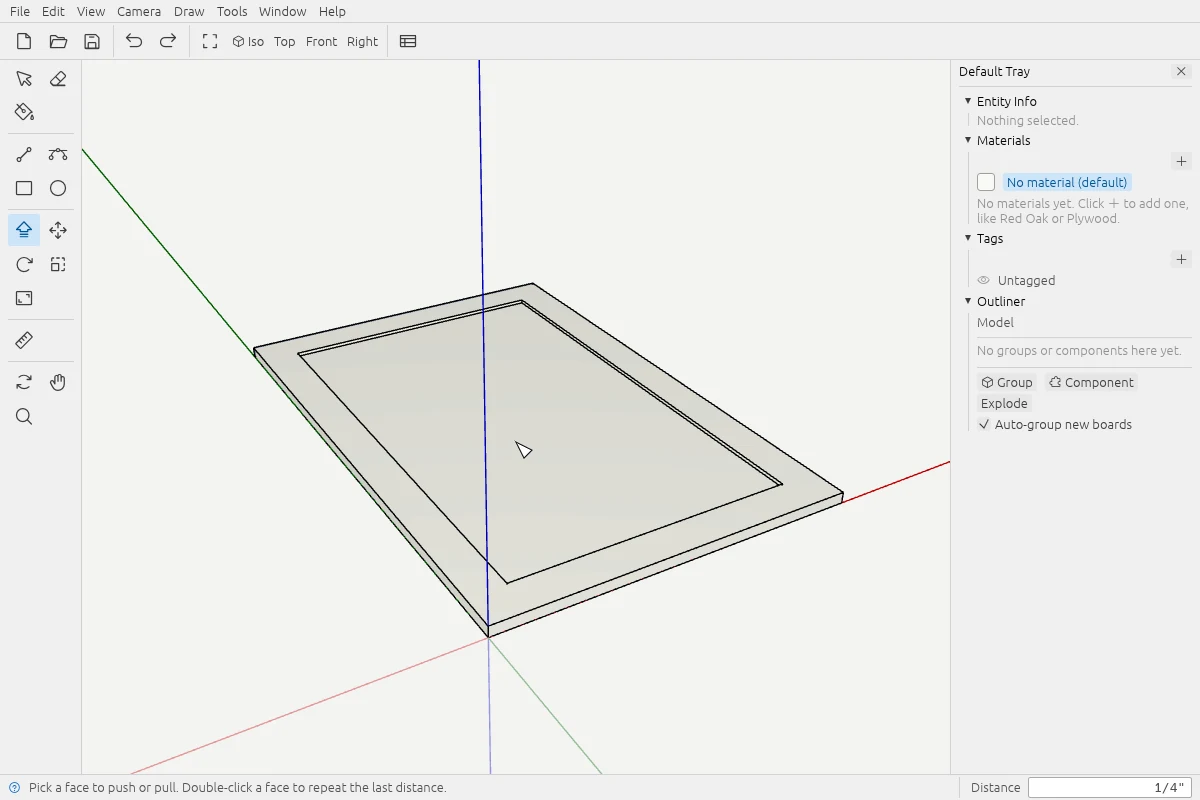
A rectangular board with an inset panel: the outline was offset inward and the center pushed down a quarter inch, with 1/4" showing in the Distance box.
A door panel: Offset the top face, then Push/Pull the center down 1/4".

Modeling

The tools you already reach for

Line, Rectangle, Circle, Arc, Push/Pull, Move, Rotate, Scale, Offset, Eraser, Tape Measure and Paint Bucket, all on their usual shortcut keys.
  • Push/Pull cuts rabbets and notches, and pushes holes all the way through for dowels.
  • Snaps to endpoints, midpoints and edges, with axis locks so lines go where you mean.
  • Type exact sizes any time, in fractional inches or millimeters: 3/4", 38mm.
  • Tape Measure lays out guide lines and points to draw against.
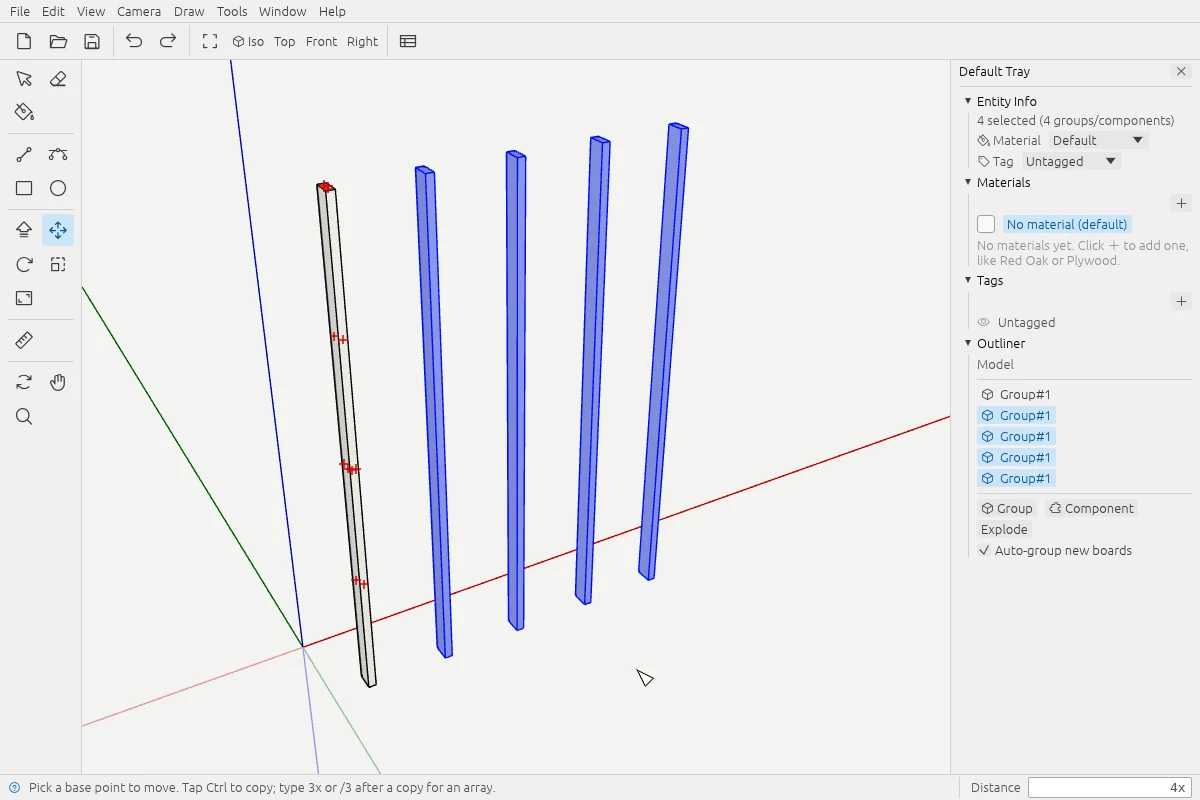
Five upright studs evenly spaced along the red axis. Four copies are selected after a Move copy with 4x typed in the Distance box.
One stud, copied with Move, then 4x to repeat it down the wall.

Organizing

Copies, arrays, groups and components

Copy with Move or Rotate and type 3x or /3 to make a row or spread copies evenly. Keep each board in its own group, use components for parts that repeat, and find them in the Outliner.
  • Boards you pull up from a flat face become their own group automatically.
  • Tags to show and hide parts of the build.
  • Undo and redo for everything.
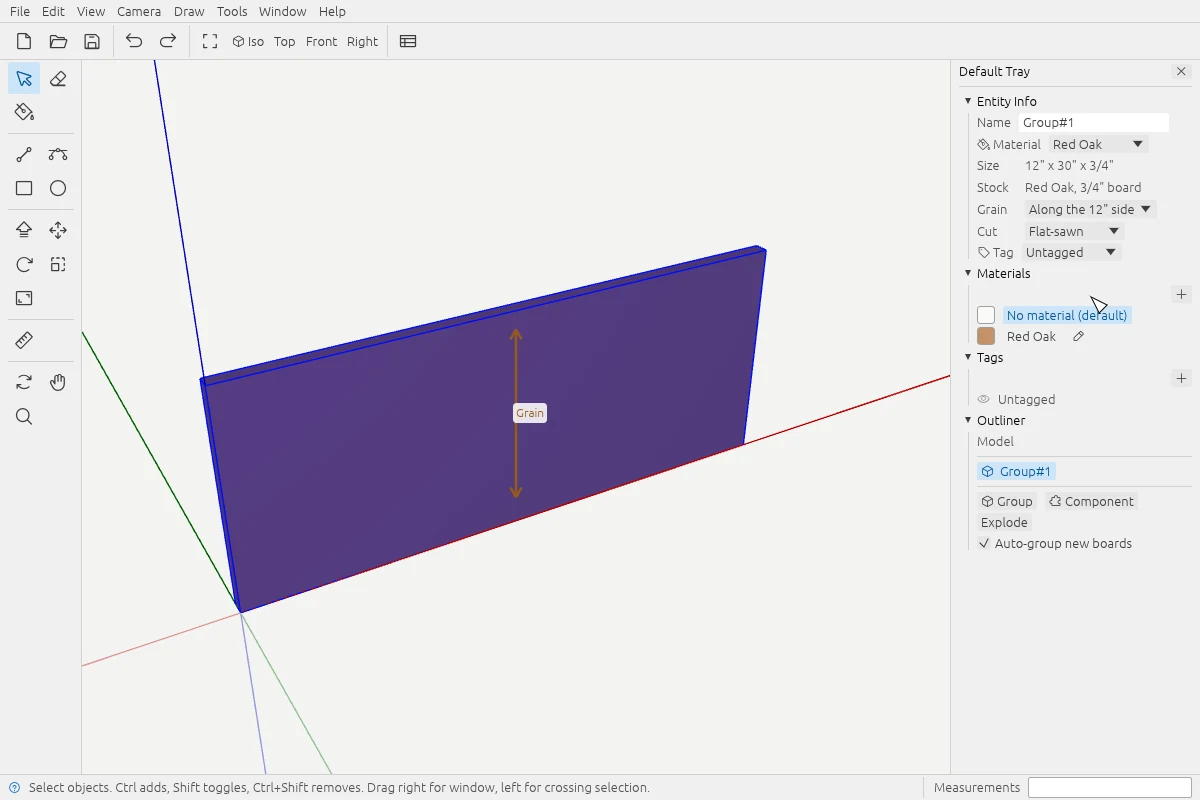
A selected Red Oak panel with a grain arrow drawn on its face. Entity Info shows size 12 by 30 by 3/4 inch, stock Red Oak 3/4 inch board, grain along the 12 inch side, cut flat-sawn.
A Red Oak panel with its grain turned to run along the 12" side. The arrow shows it on the model.

Materials

Materials that are actual stock

Start from a library of common species and products: Red Oak, White Oak, Hard Maple, Cherry, Walnut, Poplar, Pine, Plywood, Baltic Birch, MDF, Hardboard, and Pine, Douglas Fir and pressure-treated lumber.
  • Draw a board straight from stock: pick a 2x4 or a 3/4" sheet and drag it out, or just type 2x4x96.
  • Each material knows the sizes it comes in: sheet sizes and thicknesses, lumber sections like 2x4 and their lengths.
  • Parts show their grain direction as an arrow, and you can turn it.
  • Set the cut, flat-sawn or quartersawn. Lengths in the cut list are measured along the grain.
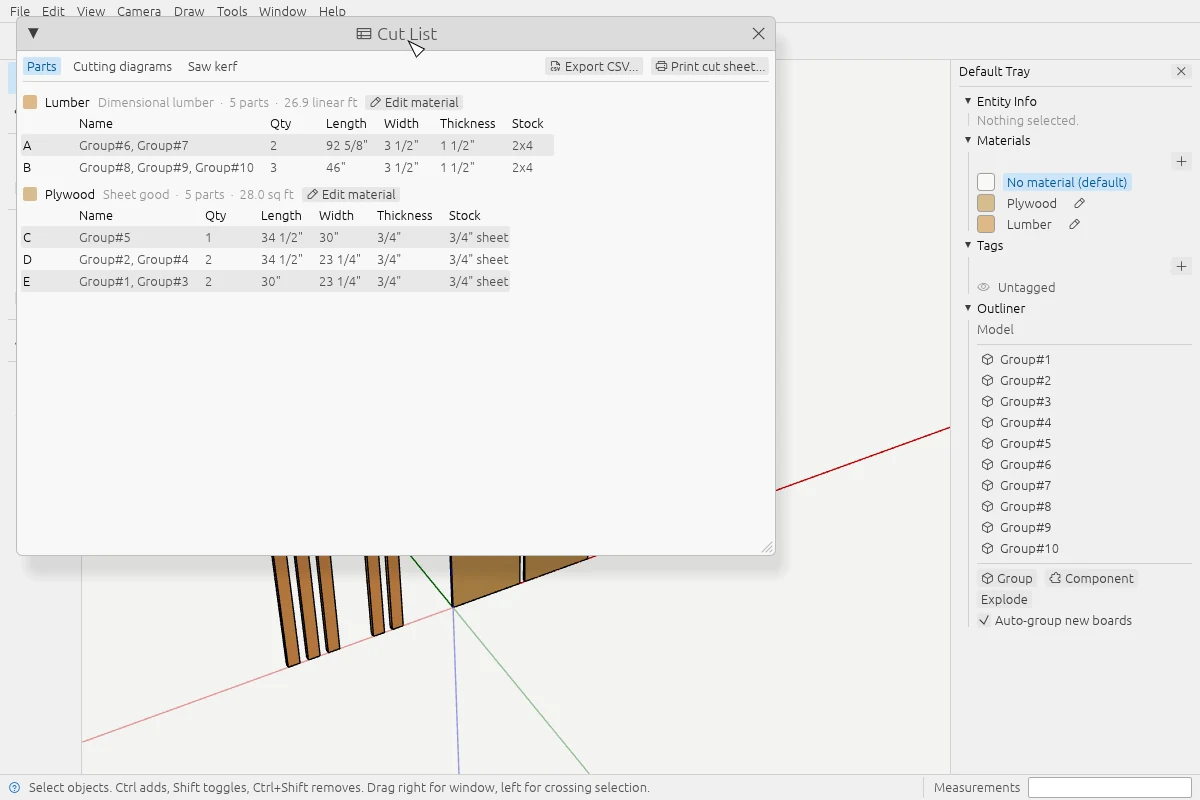
The Cut List window's Parts tab. Lumber parts A and B are listed as 2x4 stock with quantity, length, width and thickness; plywood parts C, D and E as 3/4 inch sheet.
The Parts tab: identical parts grouped and lettered, with the stock each one comes from.

Cut list

A cut list that writes itself

Open the cut list and your parts are already there, grouped by material and size and labeled A, B, C. Each one picks its stock from its own dimensions.
  • Parts that still need a material are flagged so nothing gets missed.
  • Export to CSV for a spreadsheet.
  • Print a cut sheet to take to the shop.
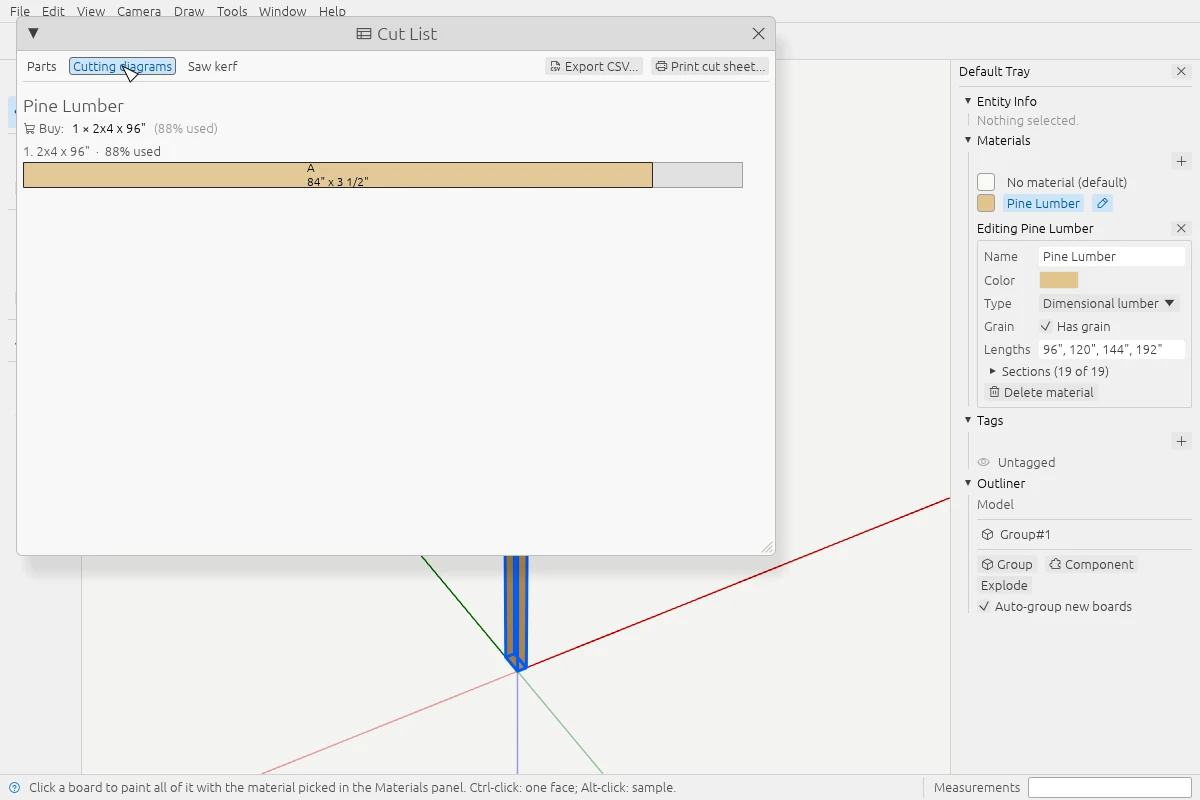
A single stud painted Pine Lumber. The cutting diagram says buy one 2x4 x 96 inch, 88 percent used, with the 84 inch part laid out on it. The material editor lists lengths 96, 120, 144 and 192 inches.
Draw an 84" stud, paint it Pine Lumber, and the cut list says to buy one 2x4 at 8'.

Cutting diagrams

Know what to buy before you go

WoodSketch lays your parts out on the stock and tells you how many boards and sheets to pick up.

  • Sheet goods packed onto sheets, keeping grain running the right way.
  • Lumber packed onto standard lengths.
  • Set your saw kerf so the layout leaves room for the blade.

Also in the box

Save and open your drawings (.woodsketch files), and export to OBJ or STL for rendering or 3D printing.

Where it's headed

The plan, roughly in order. None of these are in the app yet.

  1. Joinery the cut list understands. Dados, rabbets, mortise and tenon, and dowels, with part sizes that account for them.
  2. Edge profiles. Roundovers, chamfers and the like on part edges.
  3. Build sheets. Step-by-step drawings of each part to take to the shop.
  4. Wood movement checks. A heads-up when a design will fight seasonal movement.
  5. Project templates and hardware. Starting points for common builds, plus screws, hinges and slides.
  6. SketchUp (.skp) import. Bring in your existing models.

Try the beta

There's no installer yet. For now you build WoodSketch from its source code, which takes a few commands and a few minutes. It's tested on Windows.

  1. Install Rust from rustup.rs (on Windows it also walks you through the Visual Studio build tools).

  2. Download the code:

    git clone https://github.com/FMastro/woodsketch
    cd woodsketch
  3. Build and run it:

    cargo run --release -p woodsketch

It's a beta. Expect rough edges, and save often. If something breaks or you'd like to see a feature, open an issue on GitHub. Starring the repo is the easiest way to follow along.